Tuesday, April 20, 2010

Photos of Progress

Oh, progress!

Friday, my yard guy and I hauled 3 loads of soil (7.5 cubic yards) and filled boxes. We didn't finish filling the boxes, but we sure as heck got a long way! I ended up filling the boxes I needed asap-- the last pea box, the potatoes, etc etc.

Saturday, I planted, B weeded and helped mulch the rows. Oh, it looks gorgeous.


When B was weeding, he brought along one of his homemade beers. I LOVE the color of the bottle, so I took a pic.
There he is, hard at work. I must say that the boxes look SOO much better without so many weeds.

I planted a few shallow-rooted veggies in lower boxes. My onions are the back three rows: Walla wallas, red onions, sweet white and sweet red. I misread something: onions start to bulb when the day length is 14 hours. So, you need to get your plants to large size by 14 hours, that way, they will get big bulbs. Big plant= big bulbs. (note: this is for long-day determinate onions for us folks up north). Oh oh.

Well, I can't be too down on myself, because it's been so rainy that we probably wouldn't have seen much plant growth anyway. Even my sets, which I started a LONG time ago, are pretty small. So, I'm going to cover the plants in tarping every afternoon when I get home. That will make their day length about 12 hours, hopefully giving them a chance to get big before the bulb out. That's the plan, at least!

In front of the onions, there is a bed of spinach and a bed of basil. I hope my basil turns out. I could make bag after bag of pesto and freeze it.
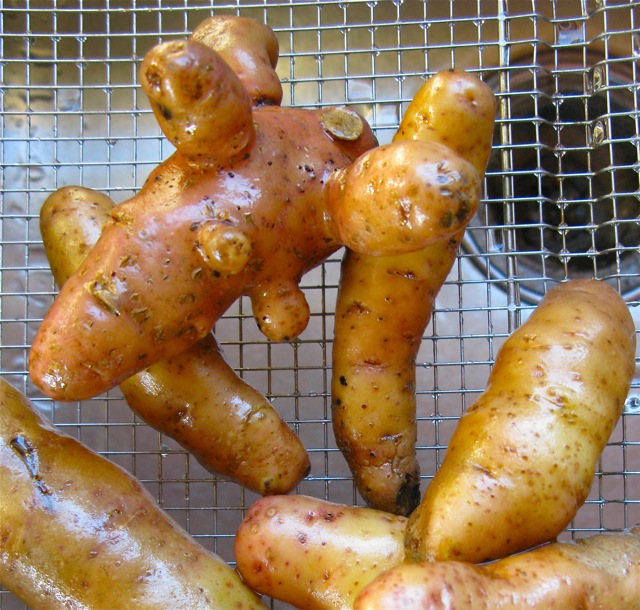
I planted my potatoes in larger beds. I planted rose fin fingerling potatoes (a little over 2 beds worth!!) and yukon gold potatoes (about 1 bed). Keep your fingers crossed that they're bountiful!

Note the netting on top of all of these beds. I got some deer netting to keep cats off of my beds. SO far: it's working! The little sticks on the side of the beds keeps the netting elevated. I'll leave the netting on until the plants are big enough to deter cats. On the potatoes, we'll see. I may leave the netting on until the plants cover a lot of the soil. I don't want cat poo in my potatoes.
I also built, painted, trellised, and planted my peas. I had one trellis done and another bed almost filled. But now, all are done. I must say, I have a lot of peas. I hope that the weather stays good for a while (not super hot, not freezing) so that they will grow. Peas don't particularly like weather over 70 (they become more susceptible to certain diseases), so I'm hoping that they grow rapidly and produce.
Here they are! They all range from about 3"-7" tall. I put some mulch in the center area of this bed because once the peas start to grow, reaching the inside of the bed to pull weeds will be difficult.
On to the already-planted plants...

My blueberries are very happy. Look at all the blossoms!
My currants have feathered out their leaves and are GORGEOUS plants. I'm so happy I have them. And, they have little red blossoms.
My raspberries are just about ready to blossom too. I need to string some additional wire up to keep the tall vines in place.
A semi-out-of-focus picture of my peas, reaching upwards.
My garlic is right on track. I can't wait to see what the heads of garlic look like. I won't harvest until probably June. Grow!
This is a picture of just SOME of the strawberries. They are all blooming and forming little teeny strawberries.
One of a few rose bush trees that needs to be trellis trained. But, I need to build the trellis first....
And finally, a fig. I didn't plant the fig tree, but it is shared by me and my neighbor. Very exciting! I'm going to dig up a few of it's suckers and hope that they make the transplant.

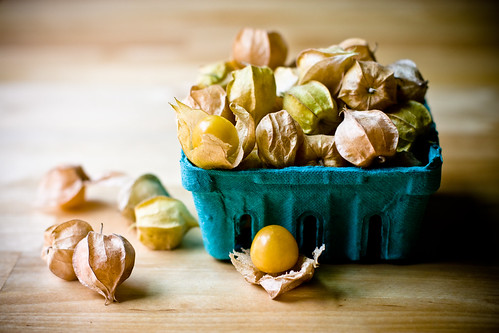
Right now, there are a few things I need to get started. I started my seeds for my purple tomatillos, ground cherries, and gypsy peppers last night. I need to start a few other plants soon, fill up the remainder beds, and build and fill the tomato beds.

The tomatoes, cucumbers, and beans will need trellising that I have to build. I think that trellises are such opportunities for new shapes and colors to be introduced to the garden, so I'm taking every opportunity to see what works. The beans will be near the peas, so I'm thinking of painting those trellises purple. The tomatoes.... I haven't decided yet. I try to do colors that will look good next to each other, but will also look good with the fruit they contain. Yellow would look great for the cucumbers, as I'm planting lemon cucumbers. Maybe orange for my tomatoes? I don't know. I don't want it to look circusy either. Should I stick to all one color? That seems a bit dull and a loss of an opportunity to be bright. Maybe a lime green for the tomatoes or cucumbers?

Hmmm... Anyway though, that's the update!

Monday, April 19, 2010

Let's put them in some dirt and get cookin'

The following plants have been planted:
  • Pea seedlings
  • Potatoes (gold and fingerling)
  • Onions (red, sweet red, sweet white, and walla walla)
  • Spinach
  • Basil
I need to plant:
  • Carrots
  • Parsley root
  • Edamame-- needs to be transferred into pots and put in makeshift cold frame outside.
I need to start seeds of:
  • Gypsy Pepper
  • Tomatillo
  • Ground cherry/pineapple tomatillo

I need to read up on when to start and when to direct seed/sow indoors:
  • Cucumbers
  • Okra
  • Beans-- all types
  • Squash
  • Eggplant
After I figure that all out and plant those that need planting, I need to:
  • Build bean trellises
  • Build tomato cages/figure out what I'm going to do w/ the tomatoes.
  • Build flower beds and plant flower seeds
  • Build cucumber trellises
  • Weed tomato area
  • Build and partially fill tomato beds.
  • Figure out watering system (more on my idea later)
Photos to be posted later from the past weekend. Things are definitely shaping up!

Friday, April 16, 2010

The yard, it is a-changin'

The boxes are built and ready to be filled. They are many in number. There are 23 3'x6' and 12" deep boxes, and there are 5 3'x6' and 6" deep boxes. There are two other 3'x6'x12", but they have been mostly filled.

I spent the late afternoon/evening yesterday finishing building boxes (B helped with the final ones), and securing them to the ground. The backyard looks flat, but when you put a box down, you quickly realize the ground is not flat. There are bumps and dips.

This group has been settled in to be as even as possible. There's one big bump in the yard that I cannot fix, but it is not substantial, so I will live with it.

These have not yet been settled down. The 6 in the front will be all moved about 10 feet back to near where the two in the back are. And, they need to be nestled into the ground so they're somewhat level.
In the back, you can see my five lower boxes. These will be for things like onions, spinach, and basil; things that don't need the 12" deep boxes. I may add another box or two; there is easily enough space.
Closer up view of the lower boxes.
One of the tricky things has been plotting where boxes will go-- you have to factor in things like foot traffic and wheelbarrows and what plants will grow in the boxes and will they overflow the paths? etc etc.

I lined up the boxes so that the paths were pretty much straight. This will make watering and wheelbarrowing easy. It will also be more pleasant to the eye. You can't really tell, but this path lines up with the blackberries and then continues all the way down to where the raspberries are in the distance.
This is the back of the boxes, and this line also lines up with the end of the blueberry and raspberry boxes in the distance. While I am going to install another blueberry box at the end that will muss this up a little, I'll make sure to keep enough space so that the path continues.

Then there's the path coming off the deck. This will be a larger path (no particular reason; just because it is nice), but it will be a straight-shot. The boxes on the left here will be lined up; those are the unsettled ones right now that haven't been nestled into the ground and leveled.
The line over to the small boxes isn't as linear, but I think that's ok because the small boxes LOOK different. So it doesn't look as funky monkey to have them a little offset.
There is a pretty open space in the back corner. I'm pretty fine with this because there's a hazelnut/filbert tree in the back corner (above the coop) that shades a lot of this area in the afternoons. I plan on putting in a shed here maybe late summer, but it will be nice to have an open area too for parties and such; we won't be limited to the deck. :)
Besides the paths that I've already shown, there are also the interior paths between boxes. I kept these rather wide. I fear I made my blueberry/currant paths a bit close together. While this isn't a big problem, I do have to traverse that area much more carefully to make sure I don't snap any branches. So, I made all the paths wide enough to accommodate overflowing plants, watering, wheelbarrows, and foot traffic.
All the pathways will eventually be mulched to help cut down on weeds. We have two big piles of wood chips right now, but I suspect while the piles may look large, they won't actually go very far in coverage. But, the local soil/chip place has pretty darn good rates on mulch, so I'm not too worried. Believe me, it's worth it to me to not have to consistently yank weeds, especially in the rocky soil we have. There are areas where the weeds are so dense and thick that we may need to tarp those areas (thus killing the weeds) BEFORE we put down any mulch. The weeds are just too thick in those areas to be easily covered. Black plastic sheeting works wonders. Then again, so does a propane torch, but those (though fun) are more expensive.

My yard guy (who has a truck) comes this afternoon. Together, we'll be filling up wheelbarrow after wheelbarrow and filling these beds. I do somewhat feel like I'm a wuss for having him come over. But, by using his truck, we just drop soil off the truck into the wheelbarrows; gravity is on our side. If I had the soil place DELIVER the soil, I'd have to pay for the delivery and I'd have to lift UP the dirt into the wheelbarrows (since the dump it in a pile). Plus, it's not like I'm sitting inside eating bonbons while my yard guy works outside. FAR from it. I'm hoofing it and sweating right alongside him.

I'm pretty doggone excited about how this will all turn out. I think the photos I post on Monday will show a markedly different looking backyard. I also get to plant my potatoes and onions and peas this weekend, so much fun going on.

Thursday, April 15, 2010

Home Depot in Heels

I just got lumber at Home Depot.
In heels.
I may have gotten quite the number of stares, but heck with them.
I needed lumber, and it was my lunch break.
Let's see those male contractors toddle around in these puppies.

Granola bars and a creative explosion.

First off, the broth from yesterday? Has all been bottled and processed. Total? 10 quart jars and 11 pint jars. No joke. And that's the processed amount; I used one pint jar last night, and I actually had a bunch more I could have processed. But how much broth does a girl need? I won't have to boil anything for a while.

Last night, I made granola bars. The recipe can be found here. In lieu of their nuts and fruits, I used raisins, dried cranberries, and chopped almonds. I added more than they recommended of the dried fruits, mostly because I wanted the bars to be moist, and I added a bit more honey. Because I didn't have rice syrup, I just took some warm water and put sugar in it to make a high concentration sugar syrup. That worked just fine.

You really DO NEED TO LET THEM COOL DOWN. I was impatient and transferred the drying pile to a drying rack, splitting the perfect square in half. Drat.

I just used the half square as a way to cut it though, so it ended up working ok. But seriously, wait till the thing dries.

I greased the pan with olive oil spray; parchment paper just doesn't like me. Olive oil spray worked wonderfully.

Final product:


YUM!!!
Yesterday, I was waiting for my broth to process (I wanted to go outside, but I don't feel comfortable going outside with a pressure canner on high and at 15 pressure...eek!), so I made up some sample jewelry pendants. I had some scrapbook paper, so I used that.
This picture better shows the high-level gloss that is on each one.
I also experimented with some organza I had and made two pretty flower pins. I used beads in the center for the stamen.

Finally, when I could turn my stove off, I went outside and made 6 planter beds. So much fun. My gardener guy comes tomorrow, so we'll get to fill up the beds! Much work to be done tonight.... I am so excited at the prospect of planting my onions and potatoes this weekend.

Wednesday, April 14, 2010

Sometimes, I cook too much.

Last night, I had some time. So, I made homemade pesto. And I boiled a duck (for the broth; we had leftover duck). And I made pizza crust and then six pizzas.

Ingredients for the night:
duck-- already made and eaten, just bits and bones remaining
flour-- freshly ground flour that i got from a local source. AMAZING. More a bit further on.
cheeses-- Trader Joes. Good quality cheese for lower prices. And their feta? Fat free. No joke.
Pesto-- homemade. Basil from farmer's market. Also used almond meal. Yummy.
Mushrooms-- farmers market. Fresh. Delicious.

First, I made the pesto. Fresh garlic, fresh basil, parmesan, olive oil and almond meal. I made so much that I was able to put 5 1-cup baggies of it into the freezer and still have enough leftover for the pizzas.

Then, I got to boiling the duck. I like to make homemade broth, and boiling any poultry is a good way to do so. With a big critter like a duck, I knew I could fill up my 23-quart pot.

I set the washed and chopped chanterelle mushrooms in a pan with some garlic and some olive oil, and let those just simmer and sautee. I eventually drained out the olive oil -- that's some good infused stuff there-- to save for some other meal.

Then I got to the pizza dough. I used freshly ground flour, which made the dough have less elasticity and more the consistency of play dough. But, it was SUPER easy to roll out, and the dough went further than regular flour dough. Because I had the ingredients and the dough, I set off and made some pizzas.

Pizza 1: Pesto (not gobs of it; just enough), mozzarella (light), chopped ripe (they actually tasted like tomatoes) tomatoes, a bit of gorgonzola and a bit of feta.

Pizza 2: Chanterelle mushroom/garlic saute, tomatoes, mozzarella and pesto.
Pizza 3: Pesto, mozzarella, chanterelle/garlic saute, and feta.
Pizza 4: crumbled turkey bacon, feta, and pesto.
Pizza 5: cream cheese and pesto with crumbled turkey bacon.
Pizza 6: Pesto, mozzarella, feta, tomato and garlic/chanterelle mushroom saute.
Needless to say, we have leftovers.

Here's the pot o' duck. Yes, it looks dirty; stuff splatters. The pot's in use. Give me a break. :)
Yummy broth.
It's cooling off in the fridge, because I didn't have time to bottle last night. So, today, I'll heat it back up, put it into jars, and then I'll pressure can all the jars. It should make a LOT.

Though the process is pretty easy, I want to emphasize a few things: You need a pressure canner to do this. Otherwise, freeze your own stock. If you can up stock, make sure to not have onions or garlic in the stock; they funkify the flavor of the broth. REALLY. And not in a good way.

I'll post recipes and photos tomorrow.

Tuesday, April 13, 2010

Movie to watch: Food, Inc.

Please go find a copy of this movie sometime soon. I found it very powerful, as it didn't portray things from one point of view (ie: animal cruelty, oil, genetic modification, etc.). It was a see-the-big-picture-type of movie.

Powerful movie, powerful message, but it makes me feel powerless.

More on it here. http://www.foodincmovie.com/

I found it very level-headedly (is that a word) produced. I did not feel like facts were left out or that facts were included for sensationalism purposes. I feel so informed... there was so much I knew, but so many aspects I hadn't considered.

Pen in a pen

The little chicks are big enough to go outside (5 weeks and 4 weeks), especially since it's not too cold here right now (40s at minimum). But, because the older birds are bigger and more numerous, I know we really can't introduce them until the babies are 12+ weeks old.

I did not want the babies in my laundry room for another 7 weeks.

So, I decided to quickly fashion a pen to put the babies into. The pen would be fully enclosed, but would be placed INSIDE the older girls' pen.

I designed it so there was chicken wire on top and on one side, that way both sets of hens could see each other and become familiar with each other. But, no real pecking or hurting could occur. The phrase "pecking order" is real, I tell ya.

I put a little coop dwelling at the one end, so they can go inside if they are cold. At the opposite end, there's a little flap, so I can get access to their food and water.

The adult hens were very VERY curious.

The babies were curious too, but it was really the adult hens that cracked me up.
They weren't quite sure what to make of the little ones. They still aren't sure-- and it's been almost 3 days.

They weren't sure if these outsiders were lunch, or entertainment, or intruders.

All in all, it's been very successful. They're getting more used to each other, and the babies are in a space big enough for them to grow big before being physically all introduced.

The 10 red girls are now almost 12 weeks old. They could start laying as soon as 16 weeks, but more than likely, it will be around 20 weeks. Once that happens, I could be getting about 9 eggs a day. They'll be small eggs at first, but then will get bigger.

In other news, the hurt hen is recuperating very nicely (see original post here). I think she's just about to normal, but I need to see her walk. I think she's become lazy, sitting in her box of comfort, eating food, not moving. A physical fitness test will soon be done...

In other garden news, I really need to hop to it and get crackin' on boxes. I need to more than double what I currently have outside. Eek. I think Hank is coming on Friday. So there's my deadline. What has me worried is that I need to not only make the boxes, but I need to place them strategically and get them nestled down so they're secure. Right now they're sort of topsy turvy all over the backyard. This will not do.

Monday, April 12, 2010

Menu Monday and weekend photos

I'm going back to the menu planning (a la Jenna) because it DOES make you stay on track so much better. Plus, we got a lot of goodies at the Saturday Market this weekend, so I want to make sure we use them!

Monday:Well, we'll be off to a bad start. I have an appointment at 5, and we have Conan at 8. So, something quick tonight.
Tuesday: Pizza with sauteed chanterelle mushrooms, feta, and garlic.
Wednesday: Broccoli florets with pesto chicken (pesto made with fresh basil)
Thursday: Kale and sausage dish
Friday: Leftovers or soup (we have a ton of wontons I'd like to use up).

On to this weekend. BUSY BUSY. I updated the chicken coop (more on that tomorrow). The sick hen is doing much better. The new chicks are outside (again, more tomorrow).

I postponed having the garden boxes filled, because Saturday afternoon, we got a DOWNPOUR, and the dirt would have been heavy as all getout on Sunday. I'll continue building this week and hopefully, we can fill them on Sunday. Still, I made 10 foot high boxes (below) and 1 6" high box (not pictured).
I think I've figured out the layout of various boxes, which makes me happy. Once a box is filled, it's pretty much unmovable, unless you want to unfill and unscrew, and that's just annoying to do. I need to level out many of these. But, I'm taking into account various walkways so that the yard looks planned rather than haphazard. More to come on this front.


The other big weekend project was a bedframe. Our mattress was on a boxspring, which were both on the floor. Envison pillows everywhere, blankets... what a mess. I wanted the bed off the floor, and then the box springs chucked (we can't have frame and boxsprings and mattress because we're in a loft).

I had gone to Ikea, and they had this bed frame. But, the frame was $150, plus $40 slats, plus the $10 beam. We don't NEED a bed frame, and for $200, I could easily build one and have us wait a bit. I even had drawn out the design and the lengths of wood I needed to get. I figured I'd incorporate some travertine tiles I got from the recycling place too.

But then, I toddled around on Craigslist and saw a posting for a bed frame. Full size. $20. The photos looked pretty dismal, but if you looked past the despicable upholstery job and the nasty brown color painted rails and footboard (the headboard-- unpainted, but with material), the thing had good bones and was possibly salvageable. And for $20, heck. It would still need slats, but that's only about $20.

So, I got the thing and lugged it home. The poor headboard was covered in this material. It is a fleecy material that USED to be white. But, it had become nastily pilled, and now was a dismal cream color. Bleh. This material had stuffing under it. It was all stapled to the headboard.
Here's the stuffing. Bleh.
But underneath, there was a solid wood headboard.
I should note that all the nasty material? STAPLE GUNNED TO THE HEADBOARD. And this is the FRONT of the headboard. No wrapping around and putting staples only in the back. And these are HEAVY DUTY STAPLES. Gack. I pried all these suckers out.
At least someone liked the nasty material.
I sanded down the slats, footboard, and headboard. Then, I decided to paint them a glossy enamel white. We already had the paint from another project. Enamel because it won't chip or scratch easily, and when it dries, it's DRIED (unlike latex which takes FOREVER). While the headboard was possibly salvageable wood-wise, because the three other components were already painted, and because the headboard was a stain I really didn't care for, I thought the paint would update and make for a clean-looking final piece.

And here it is:

The frame did have good bones too; it is not rickety in the least. There are 10 2"x3" slats under the bed. I decided to go with 2"x3"s for extra sturdiness. It may be hard to tell in this photo, but it was such an improvement that I just was giggly last night. Crazily happy. Such a clean loft now. FINALLY!!!
I changed out our nightstands to these clean ones from Ikea. They're the new lack small shelving; no hardware to hang the shelves is visible. Having narrower nightstands means that the bed could move over a little, giving B a bit more headspace. SO nice.
I also realized that due to the knotty pine ceiling, it was a really good decision to paint the frame white. And you can see that the bed now offers a lot more headspace to both sides.
For our books, magazines, and jewelry, I put them on a tray under the bedframe. B likes this magazine rack, but I'm not sold on it. I wish there was more space; I think that the V bottom will result in overflowing. If it was more U-shaped, it'd be better.
We also had this really nice blossom rug that we got for our last house. It's been in storage (and will take a while to smooth out the wrinkled roll designs on it), but it fits perfectly under the bed. About 2' of it sticks out on either side of the bed, which is a nice touch, I think.

So that was the weekend. Raised beds outside, bed frame inside, chicken makeover outside, happy hen inside, growing seedlings inside too. More updates to come.